Monday, January 23, 2017

DIY Jewelry Dish | Anthropologie Inspired

Need something to keep your jewelry in? Why not make this ridiculously easy and simple DIY that is completely customizable! Not only is this DIY awesome for jewelry, it's wonderful for any small thing like loose change.


Difficulty: 
EASY!

Tools and Materials:
Polymer Clay
Acrylic Paint (Black, Gray, White)
Paint Brush
Mold (I used a drinking glass)
X-acto knife or other sharp tool
Rolling Pin
Copper Leafing Pen

                                                                                               
                                            Instructions: 

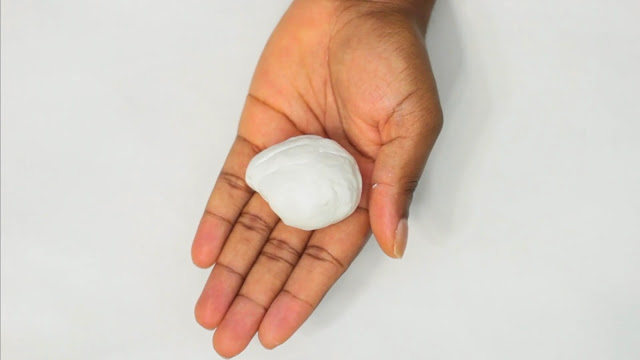
1) To begin, take a lump of clay and start working it with your hands. The aim of the game is to warm this bad boy up so it’s easily pliable. 


2) After your clay is nice and soft, roll it out with a rolling pin. I’d say to roll it out to the recommended thickness on your package. I believe mine was about a quarter inch but don’t quote me on that. 


When you’re done rolling smooth out any imperfections!

3) Next, take a glass or another oven safe container to mold your clay on. Fold it over and smooth out any air bubbles. 


4) You may want to lift the clay from the sides and smooth down to release any bubbles that may be trapped inside.


5) After it’s buttery smooth, take a sharp x act knife to cut the clay to your desired depth. 


Bake the clay according to the instructions on the paper then pop it off the glass

6) With a fine grit sander, sand down the imperfections. This may take a bit so be sure to watch your fav show!


7) This was a complete rookie mistake but I began painting the copper initials. Ideally I would have painted first. 


Paint shadows on the letter and circles and begin to paint around the letter.

8) Keep going by mixing gray, white and very little black! Paint on they inside and the outside. 


9) Finally, when you’re all done, I took a copper leafing pen and traced the top of the dish. You can leave the dish matte, or add some clear acrylic spray to make it nice and shiny. 


Once you're all done, enjoy your gorgeous dish!


Watch how to make it here:

Saturday, January 14, 2017

DIY Acrylic Calendar | 2017 Calendar

2017 is here! I've missed blogging and I've decided to come back with full force! If you're not following my YouTube channel, you should! I've been posting videos regularly and took a short brake after filming my 12 days of Christmas series. It was exhausting but well worth it. Fast forward to 2017 and I'm back at it! 

Aren't these calendars gorgeous?! Best part is it only took me about $2.00 EACH! Granted I had most of the materials but it's still a great bargain considering these are acrylic (which is usually expensive) and fully customizable!


Difficulty: EASY!

Tools and Materials:
Acrylic Sheets
Gold Leaf
Leafing Adhesive
Leafing Sealant
Modpodge
Acrylic Paint
Foam Brush
Display Stand
Paint Pen (I used white)
Painter's Tape or any other Tap

Instructions:

1) Remove the wrapping from the acrylic sheet and place the calendar template on the matte side. This is important since we want the writing to be on the glossy side.


2) With a paint pen of your choice, begin tracing the letters and numbers. I decided to make mine bigger than the template so I can actually see the numbers :) 


3) Once the paint is dry, flip over the acrylic sheet and add some leafing adhesive


4) Once the adhesive is dry and tacky, add some gold leaf!


5) Once you have your desired pattern,  add some sealer and your choice acrylic paint


6) Add a few layers until there are no gaps. I recommend doing a few thin coats to build up the color. I did thick layers and it took FOR-E-VER to dry


7) Once the paint is dry and to your liking, add a layer of modpodge to the back as a sealer. You can also use an acrylic sealer but I chose modpodge instead.


8) Add to the display stand and enjoy! I got my stand from the dollar tree.


Check out the full tutorial on my YouTube channel:


Sunday, October 30, 2016

DIY LED Glittered Pumpkin!

Doesn't this pumpkin look BEAUTIFUL??!


Difficulty: EASY

Materials:
Pumpkin (1 Large and 2 Small)
Glitter
Modpodge
Highlighter
LED Lights
Foil Paper
Tape


Tools:
Drill
Drill Bit
Paint Brush
Pencil

Instructions:

1) Paint your pumpkin white (if it’s not white already). I did several layers - about 3 to make it fully opaque.


2) Lay out the pattern - I used a pen. I made an impression on the parts where I wanted the holes. I eyeballed about 1 to 1.5 inches from the hole to make another impression on the bottom and repeated for the third row. 


3) Take a drill bit and drilled in the impressions. I do wish I made the holes bigger so the light penetrates through the pumpkin.


4) Flip the pumpkin upside down and make a hole about the size of your fist. 


5) Flip and start glittering the top! I used a paint brush to guide where the modpodge went so it wouldn’t cover up the holes.


6) Add heavy glitter until I covered a little less than half the pumpkin then I softly let out the glitter so it can have a gradient effect. Paint the holes with black paint so the tan in the holes blend in with the glitter as you can see here. 


7) Next, I take the LED lights and added them inside. the light and stuck them inside the pumpkin. Since the light didn’t shine through as I wanted to, I decided to stick the lights through the holes. I added the cluster of LED lights and covered with foil in the hopes that it would emit a stronger light but the extra LEDs didn’t really help. I later took it out and it looks just fine. 


8) I did some accent pumpkins by taking a light colored highlighter and making a pattern. I wanted to do polka dots so I took the end of the pencil, dipped it into the modpodge, dabbed the pumpkin, and added glitter. Once the dots are dry, I pulled up the stem, added modpodge, and glittered that as well.


Well, there you have it! a beautiful LED pumpkin with some accent mini pumpkins! I hope you guys enjoyed this tutorial. 


PIN ME!


Head over to my YouTube channel to learn how to create this Glittered Pumpkin!